The Class tab — running the lesson
The features are spread across four ribbon tabs. The table below shows which buttons live in each tab; chapters 5 to 8 then go through them tab by tab.
| Tab | Buttons |
|---|---|
| Class | Desktop share · App window broadcast · Sample broadcast · Audio share · Detail view · Remote control · Lock screen · Unlock · Stop All · Quick launch · Website · Message · Inbox · New chat room |
| Materials | Quiz · Quiz Manager · Survey · Surveys · Workbook Designer · File transfer · File collect · Present · Watch together |
| Control | App restriction · Internet · Block USB · Block cam · Block printer · Mute · Power on · Restart · Power off · Wallpaper · Minimize All |
| Manage | Manage groups · Selected → group · Clear groups · Divide into groups · Rename · Client management · PC Settings · Hardware · Software · Notification history · Collect Logs · SmartWorkStation (shown only in classrooms that use that hardware and product) |
| Title bar | Lock all (Unlock all when any student is locked) |
When the window is too narrow for the buttons to fit on one row, ◀ ▶ buttons appear at either end of the ribbon. Press them to scroll towards the hidden buttons.
The Class tab gathers the features you use to lead the lesson itself.
5.1 Screen sharing (teacher → students)
Shows your screen to the students as it is. Press Share screen to start broadcasting (the button label is highlighted) and press it again to stop.
- With nobody selected it goes to the whole class; select some students and only they receive it.
- Quality and delivery method adjust automatically to a wired or wireless network (you can change this in settings — chapter 10).
- Students with several monitors — Show on main monitor / Show on second monitor in the screen sharing toolbox choose which monitor the screen appears on for students who have two or more monitors. The “N students” beside it is the number of target students with two or more monitors; when it is 0 the option cannot be chosen. With Show on second monitor, the student’s keyboard and mouse are not blocked, so they can watch on the second monitor and follow along on the main one (the other monitors are not blacked out either). You can change it during a broadcast, and the choice carries over to the next broadcast, to sample broadcast and to watch together. For a student with one monitor it always appears on that monitor.
5.2 Audio sharing
Plays the sound (or your voice) from the teacher PC to the students. It can run at the same time as screen sharing, which is useful when you are talking through what is on screen. Settings let you choose plain sharing, subtitles or translation mode (chapter 10).
5.3 Full view (a student’s screen, enlarged)
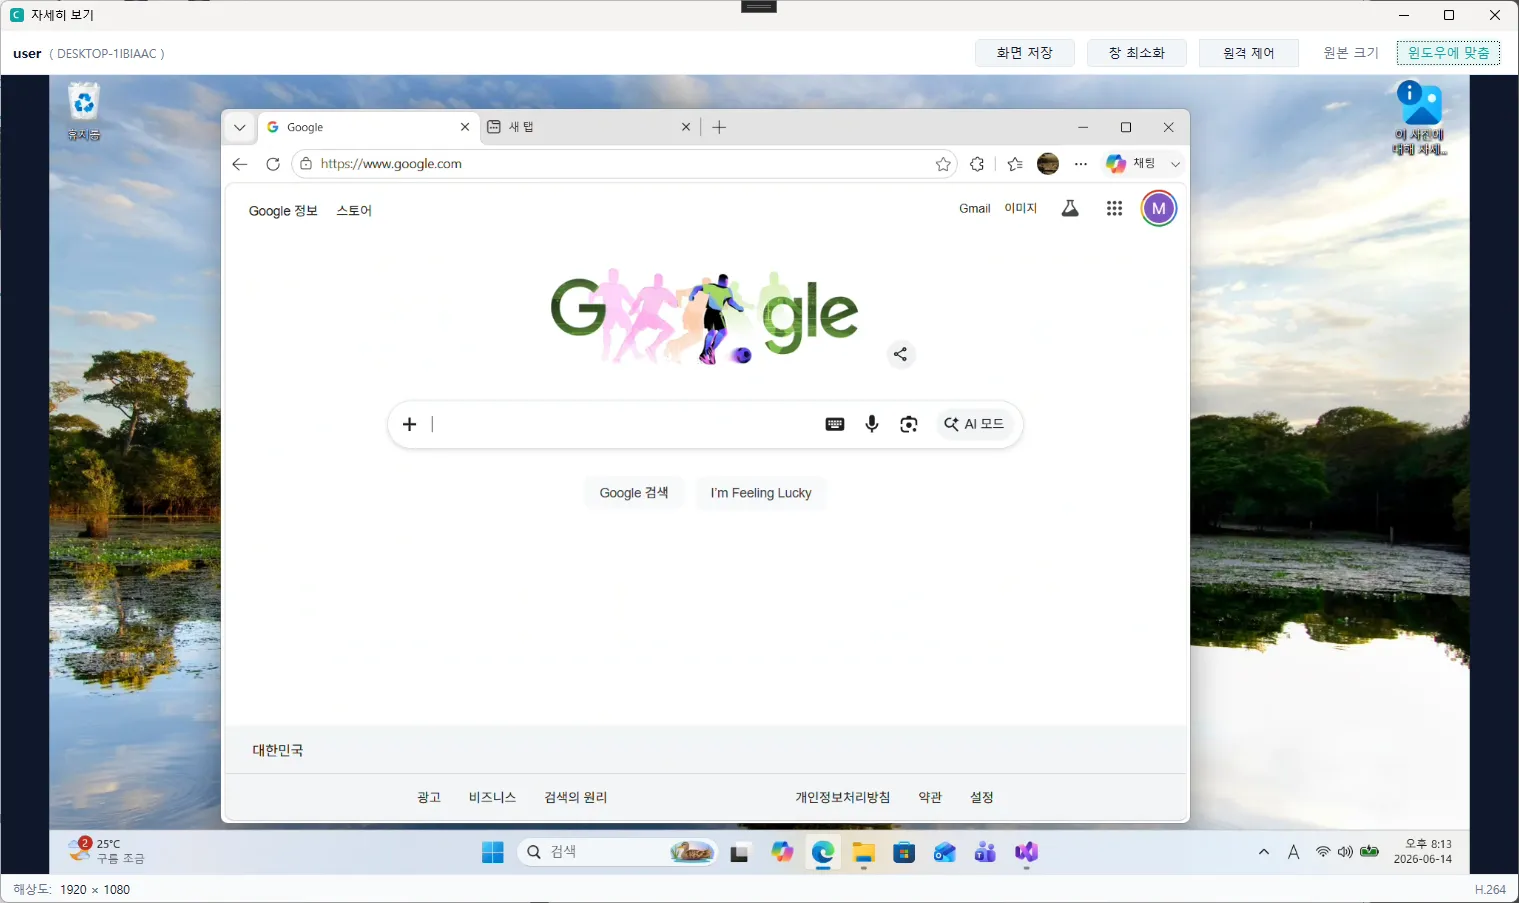
Opens one student’s screen in a large window. Double-clicking the student card does the same thing.
- Exactly one student must be selected. With two or more, a notice asks you to select just one.
- The default is a smooth standard quality; you can switch on high quality in settings.
- You can move straight into remote control from here if you need to.
5.4 Remote control
Lets you drive one student’s PC with your own mouse and keyboard — for helping a student out or demonstrating something.
- Only one student at a time. Once control begins, a notice appears on the student’s screen saying the teacher is in control.
- Only one remote control session can run at any moment.
5.5 Lock and unlock screens
Lock screen locks the selected students’ screens and blocks their keyboard and mouse, so their attention comes back to you for a moment. You can show a blank (black) screen or an image of your own. Unlock follows the same target rule and releases only the locked PCs among the selected students (the whole class if nobody is selected).
To lock or unlock the whole class in one go regardless of the selection, use Lock all at the right of the title bar. It is always there, whichever tab you are viewing. As soon as even one student is locked, this button changes to Unlock all — to lock the rest when only some are locked, use Lock screen on the ribbon.
![Lock screen — locked student cards show a padlock, a "Locked · 2" chip appears in the status strip, and [Unlock all] appears in the title bar](/_astro/fig34.DOUxSDiB_Z1ngX0t.webp)
5.6 Quick launch and Open website
| Feature | Description |
|---|---|
| Quick launch | Runs a chosen app or executable on the selected students’ PCs all at once. Frequently used entries can be saved as presets. |
| Website | Opens the same URL in the selected students’ default browsers at the same time (a learning site, for example). |
![Quick launch — enter the path of the program to run, and keep the ones you use often in the list on the left with [Save]](/_astro/fig25.Bin0-iwf_25qWjW.webp)
![Website — enter the address to open and press [Open]. Saved addresses are picked from the list on the left](/_astro/fig26.BKaC0hqs_Z1f5bNv.webp)
5.7 Messages and the inbox
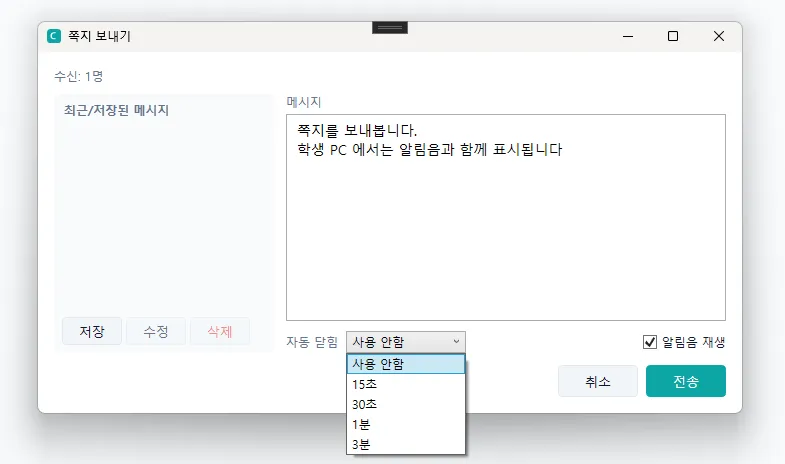
Message sends a pop-up message to the selected students (or to the whole class). Students can dismiss a message they have received.
The Inbox collects the messages students have sent. It shows sender, recipient, content and attachments in a table, and lets you copy the text, export to Excel, or save attachments. (Whether student→teacher and student↔student messages are allowed is set in settings.)